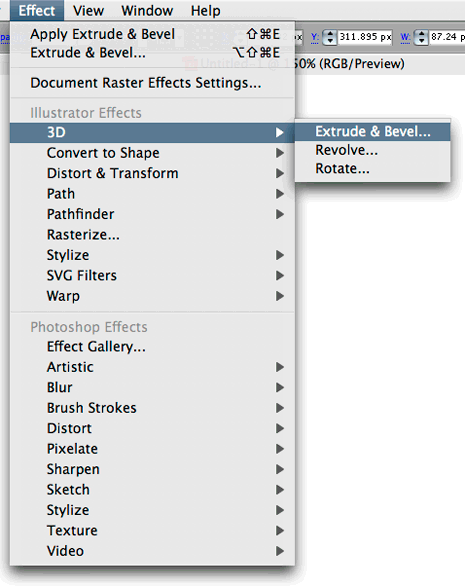
1. Make your star shape
Use the Star tool and hold Shift to make a Star shape (or any shape you want, really) on the artboard. (everything you see here is exact size).

2. Extrude your shape
With your Star selected, in the Effect menu go to 3D > Extrude and Bevel.

Check the ‘Preview’ option so you can see what you’re working with.

Now you should see something like this:

Now take the ‘Perspective’ setting all the way to the right (160 degrees)


Now make your Extrude depth something like 900 or so.


Click on the blue box and drag to get your desired rotation.

Click OK, and you should have something like this:

3. Expand Appearance
Now that we have our 3D shape, we will most likely want to have a little more control over it. Go to Object > Expand Appearance and click OK to get rid of the effect and separate our effect into individual shapes that we can edit.

You’ll notice that we now have individual shapes for each side of the 3D star shape (and the effect s gone as well, which is good). Great! Now lets make a few more changes.

4. Fill the Sides with a Gradient.
To do this, you can either ungroup (about 3 times) until you can select the individual shapes, or you can use the Direct Select Tool (white arrow) to select the individual shapes and fill them with a gradient.


Do the same for all of the sides.


No comments:
Post a Comment